Friday, October 31, 2008

Happy Halloween - Part 3

I'm sorry for the lack of imagination and or originality in titles lately! I just wanted to quickly show you what I did today! I took my daughter trick or treating with some friends and i decided to make all the kids little treat bags. I only had to do four, but they were pretty cute. I just took small lunch bags and cut off the top, put DSP on and created a handle. I put some candy, a pencil, small bubbles, some light sticks and some of the scallop punch spiders that have been infesting all of Splitcoast Stampers! These are just adorable! You can't tell by the picture, but I used google eyes and I used some bling for the nose. Really cute. Just a little something cute!

Tonight was my daughter's first time trick or treating and she caught on to this fast! The first house we went to had a bowl sitting out and they let the kids grab a couple of treats. Well my daughter is standing there putting treat after treat in her pumpkin, I had to go up there and put some if back! At other houses she would just ask for more and people kept giving it to her. I don't think it is easy to say no to a 3 yo dressed like Dorothy! One house she actually did a little dance and after she got her candy she took a bow! She is so cute. I hope everyone had a very Happy Halloween!

Next up ...Thanksgiving...AHHHHHHHHHHHHHHHHHH!
Posted by Picasa

Happy Halloween - Part 2


These are the last of my Halloween treats! I made these for my daughters daycare. They were a lot quicker than what I did for preschool!
I used the Big Shot and the Pillow Box Die to make the pillow boxes. The DSP is Ghostly Greetings. Then I just tied a piece of Pumpkin Pie grosgrain ribbon around and attached a Basic Black Scallop Circle with a piece of Pumpkin Pie cardstock that says Happy Halloween and has a little pumpkin stamped on it in Basic Black Ink. The Happy Halloween is from All Year Cheer (not sure which one) and the Pumpkin is from the Halloween Frights out of the mini. I just filled them with a little bag of M&M minis and one smarties. They don't hold too much, which is good because the kids are going to have enough treats, right? Hope everyone has a very Happy and Safe Halloween!!!


Wednesday, October 29, 2008

Stamped Tiles

Here are some stamped tiles I did for my stamped tiles class I am having next month. I wanted to put a picture on my flyer to entice! We are doing four coasters and one trivet. I used the Frosty Stamp Set for the trivet and one of the coasters. I thought it was perfect for that. These will make great gifts. I did a bunch last year for gifts, but not the trivet. These are so easy and fun to make. The directions can be found on Splitcoast.
Has this year just flown by or what? I can't believe Halloween is just a couple days away! Then Thanksgiving will be here and then Christmas and then it will be 2009! WOW!


Tuesday, October 28, 2008

Happy Halloween!

Yes, I know I am a little crazy, but I really enjoy it! I am in charge of treat bags for my DD preschool class. So here is what I did, (this is where the crazy part comes in):

So I needed 20, and yes these are for 3 yo and they will not appreciate them and they will probably rip them open and throw away the toppers before they even get home, but golly, they are cute!

I took Pumpkin Pie cardstock for the base of the topper and rounded the corners with my corner round punch. I used Old Olive for the next layer and whisper white for the smaller layer. I used the hay/pumpkin image from the Happy Blessing stamp set and colored that in with my stampin' write markers (yes, all 20!) On the Old Olive layer I stamped a couple small pumpkins and Grateful for You in Pumpkin Pie ink. Inside the bag is some candy, a pencil, small pack of crayons and a small coloring book that I made. Apparently making 20 of these and coloring each topper wasn't enough, I had to make a coloring book too! But it was a very simple coloring book. The theme is Harvest, so I went online and printed some harvest images, just about 4. I cut each out and then I cut a piece of Pumpkin Pie cardstock for the cover and placed a smaller piece of Whisper White with the scarecrow image from Happy Blessings on that. I whole punched it in the upper left corner and just tied some Pumpkin Pie grosgrain ribbon to hold it together. It took a while, but I am pleased with the result.


Monday, October 27, 2008

Baby Card!

My upline and her husband just adopted a baby and this is the card I made for them. I used Pretty in Pink and Whisper White cardstock. I used my scalloped edge punch for the bottom and Swiss Dots embossing folder for the large piece. Believe it or not, the ribbon is Pretty in Pink! I used the Greetings Galore stamp set for this and the ink is Regal Rose, I felt it needed to be a little darker than Pretty in Pink. Then I stamped the greeting along the bottom. Oh and I used my Ticket Corner punch for the corners on the small whisper white piece.


Sunday, October 26, 2008

Hawaii Pages

I went to another crop this weekend. This one was only Friday night and I only got about 20 pages done, but I'm making progress on my pictures. I have a couple to show you. These are pretty simple pages. The pictures are from our trip to Hawaii in January.

This first one was my first time using the Cricut! Uh oh! I think I need one of those! The LSS I go to lets you use theirs at the crop and I finally got to learn how. So I played around with it for this page. This is I have so many pictures from this trip I just decided to be very simple and not put a lot of embellishments. I used Not Quite Navy and Summer Sun for this page. In the corner there is a rub-on, but I'm not sure what that is from.


This next page is using Really Rust and some misc striped 12x12 that I tore down the middle. It matched perfectly. I have so much 12x12 paper, I'm trying to use it all up and I am really pleased with the way this turned out. The words are stamped using SU Outline Alphabet Lower and I used Riding Hood Red. Since I was at a crop I was limited with the colors I could take and I am finding that these In Colors really go well with the things I'm doing. The little flower is stamped with a stamp that I bought while I was in Hawaii. It is very cute and I have been using it on a lot of pages. The Palm Tree is also a die cut I purchased in Hawaii. I know you can get stuff like that here, but I found a scrapbook store in Hawaii and couldn't resist!! My husband was so happy that I was able to find that :) Although I was able to find some pretty cool pages that I don't think I could have found locally and they were made on the island too, so that is really neat, I think!


This last page I used some of the SU Eastern Blooms Rub-ons that I had left over from convention make and takes, some misc alphabet stickers and the cardstock is also misc. It is kind of nice scrapbooking these pictures 9 months after the fact because I get to relive the trip!


Saturday, October 18, 2008

Word Verification

Sorry guys, I had to add word verification to my comments. Apparently posting on Saturday night opens up the spam!


Scrapbooking Retreat

A couple weekends ago I spent a whole weekend away scrapbooking! Star
ting Noon on Friday and ending at 3:00 p.m. on Sunday. It was awesome and I got over 100 pages done! I thought I would post a few pictures for you! The weekend included food starting with dinner Friday night, it included an 8 foot table in the hall and either a motel room or a bed in the dorm room. My friend and I stayed in the dorm room because all the motel rooms were booked by the time we signed up, but it wasn't a problem. The place was very nice. This is one side of the hall, this is the side we were on.
Here is the other side:

The LSS that held this gave us great gifts in our goodie bags, they had several drawings, contests and games. Saturday was Scrappink so $10 of everyone's admission for the weekend went to that.
Here is my area, yes, it was messy all weekend!

On Saturday night there was talk in my area of staying up all night. I said I would give it a shot and guess what? I made it! My friend gave up about 3 a.m. and a couple other girls gave up shortly thereafter. There were probably about 10 of us total that made it all night long! It was touch and go about 4:45 a.m., but after 5 am hit I knew I could make it. I was a bit tired on Sunday though!! It was worth it. I think I mentioned I completed over 100 pages!

Here is my proof:


You can see I got tired of scattering them over the kitchen table!


Even with all these pages done, I am not caught up with my pictures! Luckily they are planning another weekend if March!! Now to convince DH that it is a good idea.

Wednesday, October 15, 2008

How about some Christmas gift tags!


I kind of feel I am on the ball. I have all my Christmas cards done (thanks to my convention swaps and the Christmas card class I had). Now I am working on Christmas gift tags. We made these two at my World Card Making Event last week. I used my Sizzix tag die in my Big Shot to make the tag. Stamps: Doodle This, Season of Joy. Cardstock: Riding Hood Red; Very Vanilla and Kiwi Kiss. Ink: Kiwi Kiss, Riding Hood Red. Accessories: Corner Round Punch, Riding Hood Red Taffeta Ribbon, Brads, Stickles. This was a very simple tag to make with the exception of cutting out the flowers, if you are doing several, it takes a while to cut them all out.

This next one was even easier to make. I used my Creative Memories cutting system to make two small red circles, used the Tab punch for the top. Stamps: Snow Swirled. Cardstock: Real Red, Basic Black. Ink: Whisper White Craft Ink. Accessories: Tab Punch, White Taffeta Ribbon, Gold cord. I think these are going to be the bulk of my Christmas tags this year. It doesn't take long at all to make and they are super cute! I got the idea from a Christmas card I saw on Splitcoast. I saw it a while back, so I don't know who to attribute it to, but if its you, leave me a comment and I will edit my post! At first I left the taffeta ribbon off, but I thought it looked to plain.

Tuesday, October 14, 2008

More Fall Colors!

Here is a 6x6 scrapbook page we made at my World Card Making Day Event last weekend. It would be perfect for a family photograph from Thanksgiving. Stamp Set: Happy Blessings. Cardstock: Chocolate Chip, Pumpkin Pie, Riding Hood Red, Kiwi Kiss, Watercolor paper. Ink: Chocolate Chip, Black Staz on. Accessories: Scallop Square Punch, 1" square punch, 1" circle punch, Stampin' Pastels, twill tape, blender pen. I tore around the watercolor paper and distressed it a bit with chocolate chip ink.

I love the saying in this stamp set - happy Thanksgiving, happy fall, happy blessings to one and all! The pumpkin was made using three circles and adhering them together. I just cut the stem out with my scissors.

Monday, October 13, 2008

Thank You Boss!


On Tuesday our firm is celebrating Bosses day with a luncheon and here is the card I made for my boss. Given the time of year I decided to go with fall colors and I love the way this turned out. I used the Happy Blessing Stamp Set, Inspired by Nature, Enjoy Every Moment and I spelled out Boss using an alphabet set. Cardstock: Chocolate Chip, Tangerine Tango, Riding Hood Red and Whisper White. Ink: Chocolate Chip, Staz on Black, Tangerine Tango, Old Olive and various Stampin' Write markers to color in image. I distressed the edges of the Whisper White and sponged over them as well, I added a little bit of Old Olive grosgrain ribbon. Fall is my favorite time of year, I just love the colors.

Wednesday, October 1, 2008

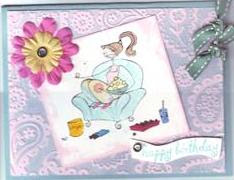
Bella Birthday


Wow, life has been busy! That is good, but I haven't had any time to blog! I miss all my blogging buddies. This weekend a friend of mine and I are going to a weekend retreat for scrapbooking! I'm so looking forward to this. I haven't had time to scrapbook in so long and I am so behind. Anyway, here is a card I made for my friends birthday (a couple weeks ago!) This Bella is perfect for my friend and I because we are both junk food junkies! You can hardly tell by the picture, but I paper pieced her pants using some patterned paper. Baja Breeze for the base cardstock; the next layer is Pink Pirouette that I ran through my Big Shot using a cuttle bug embossing folder brayered with Baja Breeze ink. I distressed the edges of the bella layer. Some flowers with bling; some left over Blue Bayou ribbon.